The beginner’s guide to White Balance
What it is, and why and how to adjust it
Having an image with a strange colour cast you didn’t want when all the other settings are dialled in is frustrating, and it’s often due to an incorrect White Balance setting. This article will explain what White Balance is, how it works, and how you can adjust it for true-to-life colour in your images.

What’s in my kitbag?
Quick select White Balance
What is White Balance?
White Balance in photography is the camera setting that adjusts the colour temperature of your photo so that white objects appear white and all other colours appear realistic.
The White Balance setting tells the software in your camera how to compensate for the light in your scene so your photograph is as true to life as possible. It’s measured in Kelvin (K) readings and displayed as a number, such as 3500K. The lower the number, the cooler the light, and vice versa.
Bright daylight, for example, is around 5600K. If you’re photographing outside on a clear day, setting your White Balance to that temperature will help the colour in your images look more balanced as long as that lighting stays consistent.
This is true for any lighting conditions you work in. It’s best to choose your White Balance setting before you start and aim for the most consistent light possible. If your lighting conditions change, you should revisit your White Balance setting.
How to adjust White Balance
There are two ways to adjust your White Balance setting: in-camera or in post-production with your editing programme of choice. Getting it right in-camera is easier and saves you hassle later.
In-camera White Balance
The simplest method is turning on Auto White Balance (AWB). Modern cameras are so far advanced that even pros often use AWB.
Your camera also has several White Balance presets. There will usually always be presets for:
- Daylight (around 5500K): for shooting in sunlight on a clear day
- Shade (around 7000K): best for gently shaded areas, such as open shade
- Overcast light/cloudy (around 6000K): best for cloudy days with soft light
- Fluorescent light (around 4000K): the approximate colour temperature of most fluorescent lights
- Tungsten light (around 3200K): for shooting under tungsten lights, which usually have a warmer colour temperature
- Flash (around 6000K): for use with strobes that tend to be very bright

From top left to bottom right: Auto Natural Light, Direct Sunlight, Cloudy, Fluorescent, Tungsten, Flash
If you know your lighting won’t change and meets one of those categories, you can probably trust these settings (but still double-check with a test image).
You can also manually set your White Balance by entering a Kelvin number such as 5600K, as in the video below. This works best in the studio when you’re using lights of a specific colour temperature and matching your White Balance to them.
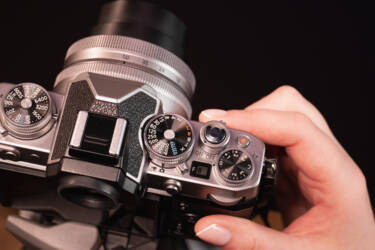
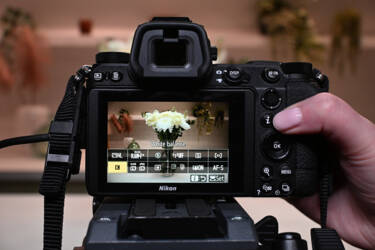
You can access your camera’s White Balance setting via the i menu, the photo shooting menu, the video recording menu or the display on the back of newer mirrorless cameras. For even more presets and detailed information, check Nikon’s online camera manual. This one shows how to change the White Balance on the Zfc.
Adjusting White Balance in post
Photo editing programmes make it easy to adjust your White Balance after you’ve taken the photo, especially if you’re shooting in RAW file format.
You can adjust the White Balance of your whole image with the temperature slider in your editing programme of choice, for example, Adobe Lightroom. This can warm up or cool down the photo until it looks more natural.
More advanced techniques for changing White Balance include using the curves adjustment for different colour channels (red, green and blue), applying an adjustment filter in a programme such as Photoshop, or using masks to edit the White Balance of a specific element of the image.
Shooting RAW and ‘fixing it in post’ sounds appealing, but getting it right in-camera is much less work for future you. A photo with too strong a colour cast from the wrong White Balance sometimes can’t be fixed no matter what edits you try, so do the work up front.
Top tips for nailing White Balance every time
You have a few options to ensure you get your White Balance setting correct in-camera.
First, you can use a grey card, as in the video above. They’re exactly what they sound like: a grey piece of material. Specifically, 18 per cent grey. In White Balance, select ‘Preset manual’, then the preset you will like to save to. Click back to ‘Preset manual’ – the screen will pop up PRE1 for example – then fill the yellow frame with the grey card. If successful, data will be acquired.
Next, make sure your light is consistent. Studio lights are ideal for this because you can control the light completely. But you can still be mindful of your light when working outside or in difficult light. Aim for a time of day with the quality of light you want (for example, golden hour) and try not to mix light sources such as tungsten and sunlight.
Finally, don’t overcorrect the White Balance or adjust it unnecessarily when you edit. Cranking the slider too far in one direction can make the photo look unnatural, or you could lose the colour of the light you’re trying to convey.
More in Camera 101s
Better photography starts here

Unlock greater creativity
